Photograph Aurora Like a Pro
Alaskans tend to take advantage of their long days in the summer by getting out and hiking, biking, camping, hunting, and fishing. We savor the opportunity to have six hours of sunlight to enjoy on a weekday even after the work day is done. Farther north, the sun never even goes down. But as winter comes, the light goes down sooner and the nights grow longer. Temperatures drop, chills set in. And while some types of activities go away, they are simply replaced by others that can be pursued in the winter. Nordic skiing, snow shoeing, trapping and snow machining take over as popular outdoor activities. And then, there is a small but growing (thanks to the prevalence of digital cameras) sliver of the population that pursues another activity: aurora borealis chasing.
There is a lot that goes into planning and preparing for a night out in the cold and dark seeking the perfect aurora photograph. Some people head out more prepared than others. I lean toward the prepared in order to not only be successful but to enjoy the experience.
Preparation
Unless you live north of the Arctic Circle, you can’t just head out on any clear night to photograph the aurora borealis. There are certain conditions that produce strong auroras, strong enough to be seen farther south; and they are not always present. So you need to know how to interpret the space weather as well as the Earth weather, and get a read on current conditions.
First, you can’t see the aurora if it’s cloudy where you live. In Alaska, your best source of getting weather information is the NOAA Alaska Region website. You can get detailed regional forecasts and examine real time satellite imagery of cloud cover, including six-hour loops, in your area. That way, if it is cloudy where you are, you can at least look for the holes in those clouds using satellite imagery. Your best bet for nighttime imagery is to go with the “Thermal IR” or “Infrared” images.
Second, you need to know if the space conditions are going to produce an aurora in your area. The first indicator is the strength of the forecast for that night. The best forecast service I have seen yet is offered by NOAA, and you can subscribe to a variety of email alerts, but I recommend the 3-day forecast. It is updated several times a day and has proven quite accurate over the last year I have used it. I have not found the Geophysical Institute Aurora Forecast page to be accurate, as it is not updated regularly. For a regularly-updated short term aurora borealis forecast, visit the Softserve News forecast page. You will want to look for what “KP Index” or “Planetary K-index” is predicted. The higher the number, the further south the aurora will reach. For example, a KP3 aurora can reach overhead Anchorage, while a KP7 aurora can reach overhead Seattle. Your best bet for obtaining and understanding the data necessary to determine if there is going to be an aurora is to visit Spaceweather.com. The real time information you need to view is on the left side of the page, while the center of the page provides information useful in knowing what conditions may exist in the next couple of days. In that center area, look for discussions on when a CME (Coronal Mass Ejection) is expected to hit the Earth’s magnetosphere. On the left side of the page, look for a high Solar wind (better than 500 km/sec) and a southerly Bz in the Interplanetary Magnetic Field. The higher that Bz (south) number, the better. For the November 8-9, 2013 display, it was approximately 8.5. You can also see the current and anticipated KP Index on the left side. Additionally, you can sign up for text alerts on Spaceweather, for a nominal monthly fee ($5). Another good site for real time data is the NOAA POES Auroral Activity website.
Finally, in addition to the real time data on Spaceweather and NOAA POES Auroral Activity, sometimes it’s nice just to be able to look and see. There are two aurora cams that are worthwhile to bookmark on your computer and smartphone. For Alaska, you can’t go wrong with Ronn Murray’s Alaska Aurora Cam, housed at Sirius Sled Dogs in Fairbanks. For Canada (even though I know of many Alaskans who follow it), keep an eye on the AuroraMAX aurora cam in Yellowknife. For Facebook reports, join the Aurora Lovers and Aurora Borealis Notifications pages. I also follow the @AuroraMAX and @AuroraNotify Twitter feeds, which provide real time updates.
Ready for the Road
Most people who are experienced and prepared drivers in Alaska have a winter survival kit in their car. I have one of those. But I also have an extra set of gear in the back of my car to provide some additional comfort in my aurora hunting. I have a bag that contains a MSR Whisper-Lite stove, a MSR bottle of white gas fuel, a Ziploc with snack bars, instant Starbucks coffee, hot chocolate, and plastic eating utensils. There is a bag of Sailor Boy Pilot Bread and a container of creamy peanut butter to go with it. I also have a small cook kit and a kettle for boiling water, and a travel mug for drinking hot liquids. This bag, along with a few camping chairs and a -20 F sleeping bag, stay in my car at all times.
In my office, I keep a camera bag fully-loaded and ready to go for running out after the northern lights. Having the gear ready eliminates frustrating and stressful running about and panicking when you realize the aurora is going, and it avoids missing something important during that chaotic time. The bag contains my Nikon D800 and three lenses: Nikkor 14-24 f/2.8 AFS, Nikkor 24-70 f/2.8 AFS and the Nikkor 70-200 f/2.8 AFS VR. I also stock an assortment of CF and SD cards, spare batters, lens cloths, Lee GND filters (in case there is a great aurora display over some artificial lighting, like the city or a cabin), battery charger, and AC inverter to plug into my car “cigarette lighter” outlet. Sitting next to it is a one-gallon jug of water I take with so I will have something to boil to add to the coffee or hot chocolate packets.
Before heading out, you need to make sure you are dressed for the long haul. From head to toe, you will not see me wearing cotton. It has to be either synthetic or wool or fur, for the simple reason that cotton, when wet, takes longer to dry and does not retain heat as well. For my head, I take a seal/beaver/otter hat handcrafted by an Inupiat artist, a thin hood layer, and a mask. I wear two layers under my jacket, and a pair of thermals under a pair of snow pants. For my hands, I prefer a thin liner glove underneath a set of fingerless gloves with a mitten flap. On my feet, a pair of wool socks and a set of Baffin polar industrial boots. Sometimes I wear moose hide Steger Mukluks of my Baffin boots, depending on how cold it is or how much snow depth there is, or if I anticipate possibly having to step through shallow water.
When to Go
Then there are certain times of the year that are best for chasing the aurora; you can’t effectively go aurora chasing when it is not dark. (You could go in the daylight if you are a sucker for quixotic pursuits.) I know, it seems crazy to mention, but a lot of people ask me when the best time of year is to see the aurora, or they ask if it has to be cold in order for the aurora to come out. So, my answer is, the best time is when it is dark and in Alaska, that more likely than not means cold. Sure, it starts getting dark enough to see them in August, and you can still see them in April, but most of the time during those months in between, it is cold outside. Also, the aurora is most active around the fall and spring equinoxes – no one knows why, that’s just the way it is. That makes September-October and March-April the best times for viewing and photographing the aurora, although I have photographed some good displays in August and November.
Another consideration is the phase of the moon. I rely on the U.S. Naval Observatory to check the phase of the moon and when it will rise and set at a particular location. Unless you are planning on using silhouetted trees as your foreground, a new moon is not the best time to capture the aurora. A little bit of moonlight will bring some detail to the landscape and make your photo more interesting. With a dim aurora, a full moon will provide too much light and overpower the aurora (but with a strong aurora, it doesn’t matter).
Where to Go
If the conditions are right and you have the gear ready, you need to decide where you are going to go for the evening. I have scouted several locations within an hour to hour-and-a-half from Anchorage that have proven to be good locations. What makes a good location? If you don’t want city lights in your photo, get out of the city and out to a location with an open view of the sky to the north. Try to find a place with some foreground elements to add interest. While sometimes the aurora can be awesome enough to stand on its own with a flat foreground that is generally not the case. A great aurora photo also includes an interesting landscape. Look for a location with some good foreground elements – water, trees, distinctive mountains, maybe some sort of structure (like an old bridge or building). Near Anchorage, good locations can be found along the Turnagain Arm and Knik River (although, be on the lookout for the pink glow of Palmer on your horizon). The Matanuska Valley and Hatcher Pass offer excellent locations as you get farther away from Anchorage. Suitable landscapes with open skies can be found on the Parks Highway in the Broad Pass area just south of Cantwell. The Interior regularly gets good views of the aurora on clear nights, from Fairbanks to Delta to Copper Center. Farther north, great viewing can be found on the Dalton Highway near Wiseman and in Atigun Pass.
Taking the Photos
It may seem like a lot of settings at first, but once you get familiar with capturing the aurora, these settings will become second nature.
Lens selection and focus. It is preferable to have a lens no slower than f/2.8 and as wide as 24mm. Shooting at f/4.0 or slower will often produce too long of an exposure to get the brilliance you need for some of the less brilliant, but still lovely, displays, and it will create undesired star trails at exposures longer than 30 seconds, sometimes even 15 seconds depending on your focal length. And having that wide focal length of 24mm or wider is key when you are trying to capture a phenomenon that encompasses the whole sky. Disable your automatic focus and use manual focus; then set the focus point to near infinity. If you place your focus point right at infinity, then you will get slightly-out of focus images. Use your initial waiting time to take several test photos, moving slightly off infinity in each direction, and check the focus of the image (by zooming in on the stars while viewing in your LCD display) each time until you find the right setting. If the moon is out and bright, I will actually turn on the auto focus, focus on the moon, and then turn it back to manual focus, locking in that setting. You can also use Live View mode to zoom in on a focus point and manually focus on that.
Filters. Remove any and all filters from your lens. We all like to put UV filters or some other neutral, clear filter on our lenses to protect them from damage. But any filter of any kind that is screwed onto a lens will create a distortion, represented by concentric circles, in dead center of your image. Somehow, the light of the aurora bounces back and forth between the lens elements and the filter during long exposures to create the undesired effect. With that said, I have used graduated neutral density filters (square filters in a bracket attached to the lens) to darken a brightly lit foreground or to balance the exposure of the aurora with its reflection on a water surface.
Camera functioning. The key to keeping your camera working is its batteries. I always take at least three spare batteries with me when venturing out into the cold. I keep them in a quart-sized Ziploc™ bag and tucked inside amidst the many layers I wear to keep myself warm. As your battery power starts to wane, simply replace the cold battery with a warm one. Also be mindful of condensation. At extreme colds, your breath will fog up and frost the back of your camera, including the viewfinder and LCD display. So, hold your breath when composing. To prevent fogging and frosting of your lenses, either keep your camera and lens together in a camera bag when bringing back into your vehicle (and keep the bag away from a heat source), or simply remove your battery and leave everything outside. If leaving your camera outside for extended periods of time, you may also want to cover your lens element to prevent frost buildup. One thing I will also do if I have my vehicle nearby is to run my camera directly on A/C power, running the power cable through an A/C inverter that is plugged into my “cigarette lighter” plug.
Settings. With your aperture set at f/2.8 (or whatever is the widest opening on your lens), set your exposure mode to manual. Then, set your exposure at 15 seconds and ISO at 800. This is a good starting point, but, depending on the intensity of the aurora, you may need to adjust your shutter speed faster or slower and/or adjust your ISO up or down. My most common setting is ISO 1600 at 15 seconds, but I have done it at ISO 400 at 2 seconds for a really bright aurora and ISO 3200 at 30 seconds for a really dim aurora. If your exposures need to be longer than 30 seconds, then use a higher ISO before you set a longer exposure. If your camera has the function, enable your High ISO Noise Reduction. You may also want to enable your Long Exposure Noise Reduction. Set your white balance to Auto. Finally, make sure you are shooting in RAW mode for the type of file you are creating.
Tripod. Of course, the basic rules of long-term image stability govern: tripod, cable release, and using the mirror lock up feature. One of the more challenging aspects of composition for an aurora shot is ensuring that your horizon is level. This can be accomplished by using (a) a bubble level for your hot shoe, or (b) using the viewfinder grid in your camera (if you are lucky enough to have one; the newer Nikon cameras do).
Now you Wait
Now that you are suited up, geared up, have checked the latest data on what the geomagnetic activity is and have found a good location with clear skies, it’s time to wait. And be patient. And wait some more. On a good activity night, you will not have to wait long, as the aurora can hit as early as dusk. And if it is good and looks like it is going to remain busy all night, don’t stay in one location; move on to somewhere else to capture other images. I like to diversify my shooting locations so that all of my aurora borealis photos do not all look the same. Diversity is one way to make your aurora images stand out compared to others. And just like any other landscape photography situation, it is key to vary compositions, lens focal lengths, and orientation (horizontal or vertical). If you feel like you have captured “the shot” for the night, keep shooting and try new techniques and compositions. When I can, I like to set up and capture images for creating a time lapse movie. It’s best, though, to take along a second tripod and camera (or even a “rail” system) to capture the time lapse so you don’t have to worry about missing a good still capture.
A short night is typically about three hours. On an October night in 2012 with a particularly spectacular display, I was out for eight hours, and could have stayed out more. I felt, though, that by 4:30 a.m. I had captured a lot of really good images and could go to bed satisfied. But even having great aurora borealis images to show for a night out in the cold cannot truly capture the thrill of just being out there and witnessing this amazing phenomenon.
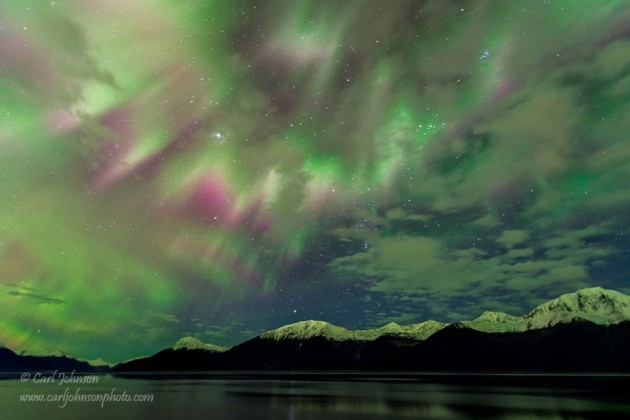

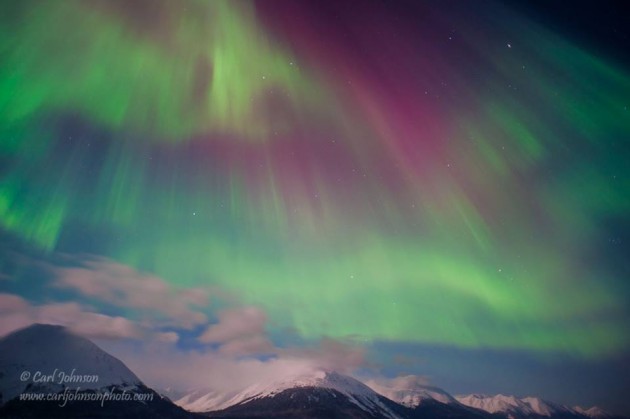


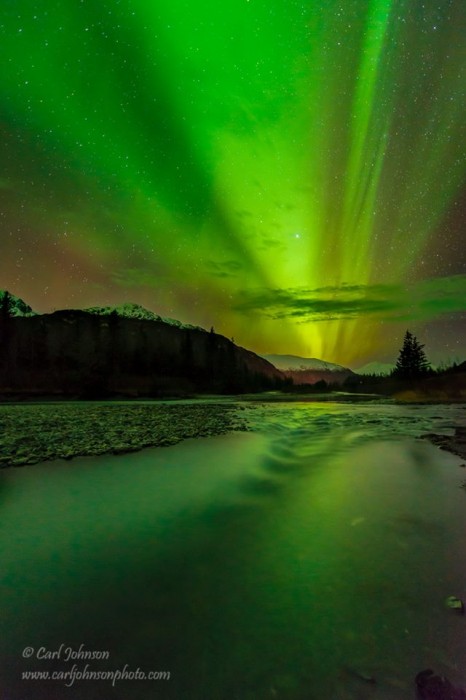
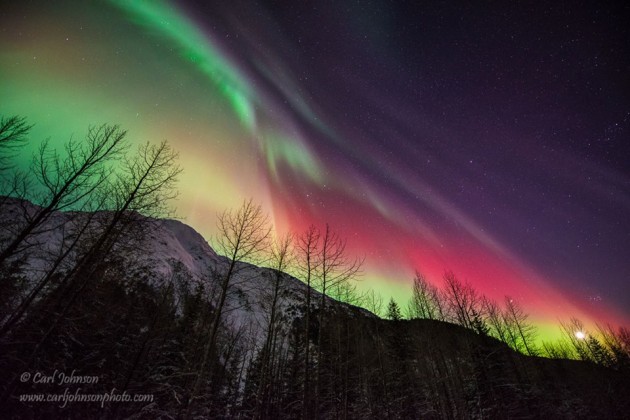

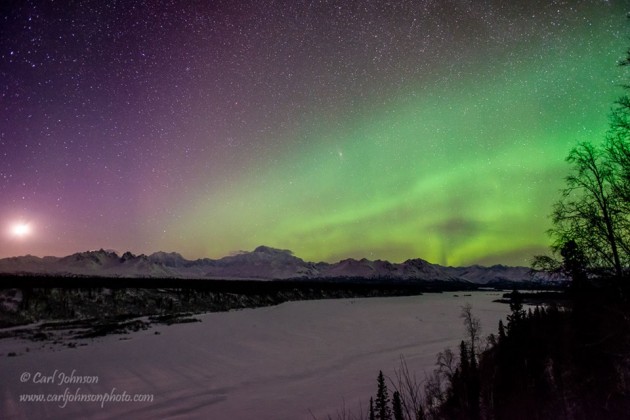
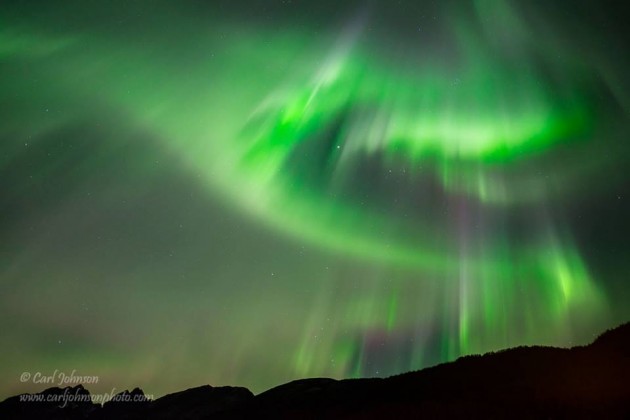
Those are amazing and beautiful Carl, thank you so much for sharing them.
Two antlers up. Thanks.
Thanks for beautiful photos, and for taking time to explain in detail all that is involved!
Now we just need some good sunspots….
Thanks so much, Carl. I’ve been enjoying your photos for a few years, now, and now I know more about why they’re so spectacular.
I have only been at an airport in Alaska for 20 minutes (which our dear friend slipstream told me doesn’t count), and the aurora is one of the few celestial phenomena I’ve yet to witness firsthand. However, I’ve been on many winter hikes, and know how to stay warm. Put a layer of silk (sock liners, long john top and bottom, glove liners) between your skin and the wool layer. It will wick moisture away from your skin better than any synthetic I’ve tried, and the combination of silk and wool (or cashmere, or alpaca, or whatever) has stood the test of time. This combo not only retains body heat, it also will keep you from hypothermia should you get wet, whether from snow, rain, the terrain, or even a spilled drink. Health and peace, and thanks again.
Thanks for that information. Beautiful photos.